# Machine-Specific Instructions
# Power Switch Mod
> [!Note|style:callout|label:APPLICABLE MODELS|iconVisibility:visible]
> 230V (EU) Gaggia Classic Pro, Eco, Evo, and E24 models with an Eco PCB.
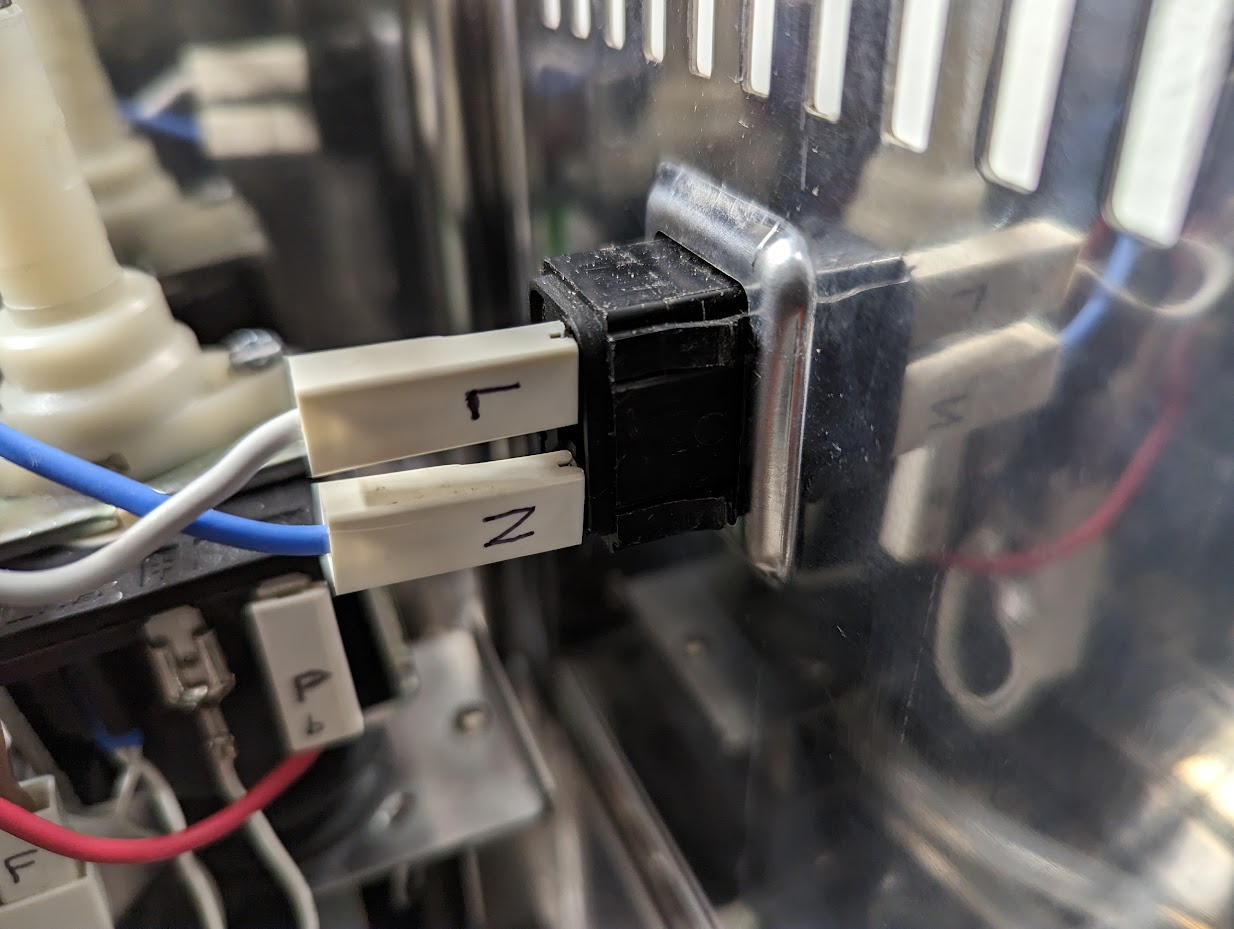
A Gaggia Classic with Gaggiuino typically takes 10-15 minutes to reach thermal equilibrium. However, in adherence to EU regulations, Gaggia Classic models available in the region are equipped with a PCB (Eco board) designed to power off the machine after 20 minutes of idle operation. These machines also have a monostable (spring-return) switch that defaults to the "Off" position when not pressed. To make the switch bistable a spring must be removed.
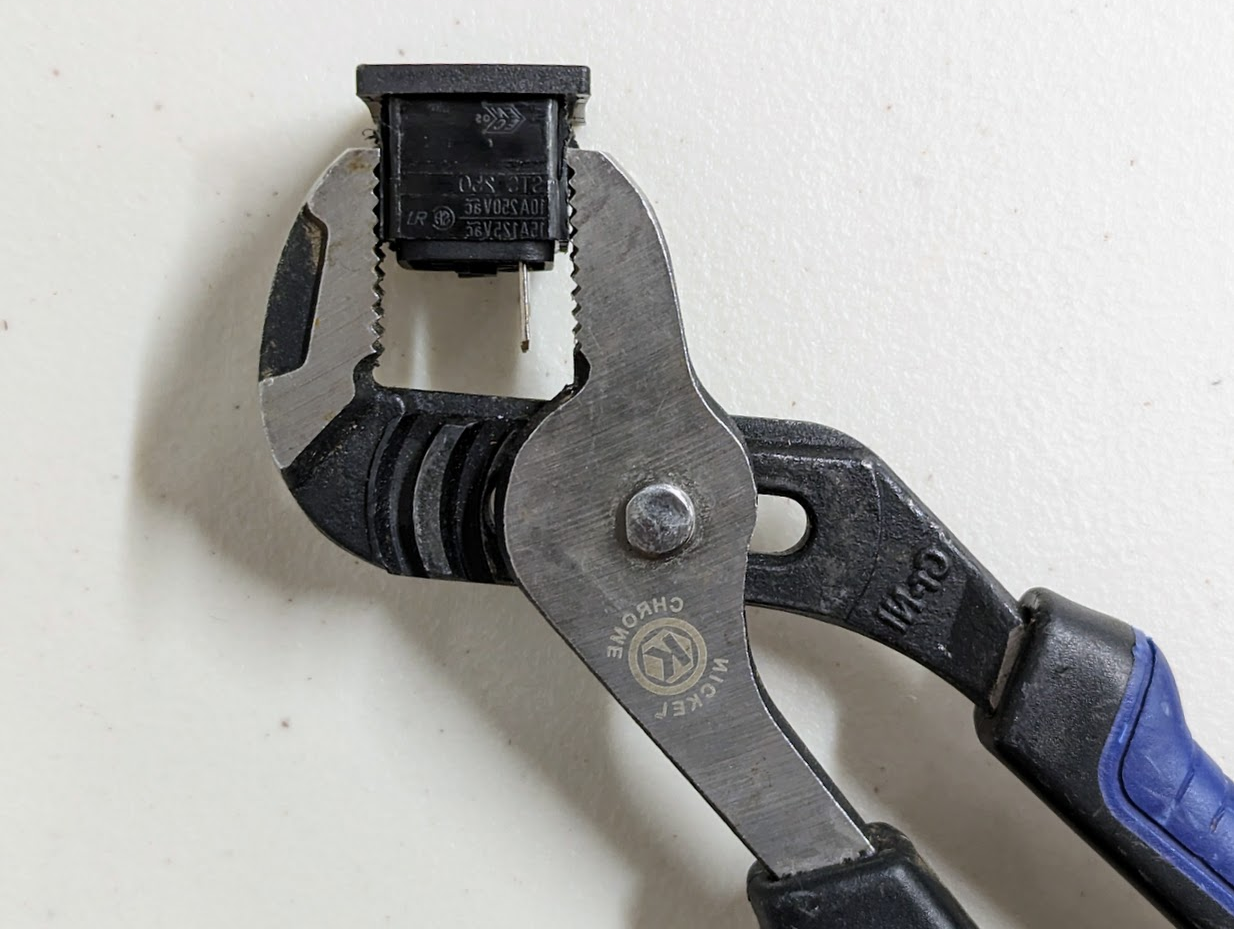
Remove the switch from the machine. Use a thin pry tool to gently push the side walls one at a time until the locking tabs (circled red) are released. Remove the 3rd spring, then reassemble.
> [!TIP|style:callout|label:Video Guide|iconVisibility:visible]
> 1:39 to 2:31 of this video shows how to remove the spring. The video *should* start and stop at those points, but be aware as the rest of it **does not** pertain to this mod.
>
>
# Combined Connector Insulation
> [!Note|style:callout|label:APPLICABLE MODELS|iconVisibility:visible]
> Gaggia Classic Evo Pro and E24
Most Evo and E24 models have a combined shield block around the switch connectors. It is recommended to remove the connectors, insulate them separately, and then label prior to completing the mod. This is especially important if doing stock wiring integration because some connectors will be left in the machine disconnected.
### Bill of Materials
* [Self-Fusing Silicone Tape | 25 mm W, 1.5+ m L](https://www.aliexpress.com/item/3256805094022385.html) **OR** [Silicone Heat Shrink Tube | 6 mm dia](https://www.aliexpress.com/item/3256801522005095.html) and a heat gun *(duplicate from the Wiring section of the [BOM](Readme.md#bill-of-materials))*
* Oil-based permanent marker recommended
### Instructions
Disconnect the connector block (it's easier to do with the switch or boiler removed). To remove a connector from the block, insert a small screwdriver to depress the locking tab, then pull the connector from the rear.
It is recommended to remove the connectors one at a time and insulate with self-fusing silicone tape or 6 mm silicone heat shrink tubing, labeling as you go.
> [!TIP|style:callout|label:|iconVisibility:hidden]
> Oil-based permanent markers write well on silicone.
> [!TIP|style:callout|label:Video Guide|iconVisibility:visible]
> This video (starting at 0:59) shows how to remove a connector from the combined housing.
>
>
# 10-12 Bar OPV
> [!Note|style:callout|label:APPLICABLE MODELS|iconVisibility:visible]
> 120V (US) Gaggia Classic Evo Pro and E24
Gaggia decided that the Evo and E24 would come with a 9 bar OPV in the US, likely due to the number of people there who changed out the spring in their Gaggia Classic Pro OPVs.
Unfortunately, OPVs don't open all at once. For example, a 9 bar spring might initially open a bit at 8.2 bar, slightly increasing flow until fully open around 9 bar. When the OPV opens, water is diverted and Gaggiuino control can't determine if or when that happens. For this reason, the OPV should be set at least 1 bar above the highest desired shot pressure. Most people want to have 9 bar shot profiles available, so for Gaggiuino the OPV should be 10-12 bar.
### Bill of Materials
Pick one option (see instructions below)
1. New Spring: [Etsy (US)](https://www.etsy.com/listing/1556589768/12-bar-opv-spring-for-gaggia-classic-pro), [Shades of Coffee (UK)](https://www.shadesofcoffee.co.uk/115bar-opv-spring), and many more
2. Washers: [Home Depot (US)](https://www.homedepot.com/p/Everbilt-3-mm-Stainless-Steel-Metric-Flat-Washer-4-Piece-842358/204994885) or other hardware stores
Washer Specifications: 300 series stainless steel, M3 (6.9-7.1 mm outer diameter, 3.0-3.6 mm inner diameter, 0.5-0.8 mm thick)
### Instructions
There are two methods:
1. Install a new 12 bar OPV spring
2. Increase the 9 bar OPV spring force by pre-loading it with 3-4 M3 washers
Start with 4 washers if they're 0.5 mm thick; start with 3 if 0.8 mm thick.
In both cases you will need to open the OPV and access the spring (see video below for details).
After Gaggiuino installation is complete, the OPV pressure can be tested (and the number of washers adjusted if necessary) by inserting a blank basket portafilter and doing one of the following:
* Run a shot set to a 12+ bar target and verify pressure reaches 10-12 bar
* Run backflush and verify pressure reaches 10-12 bar
> [!TIP|style:callout|label:Video Guide|iconVisibility:visible]
> Here is a quick video on how to access and change the OPV in a Gaggia Classic Pro or Evo:
>
>
# Grounding
> [!Note|style:callout|label:APPLICABLE MODELS|iconVisibility:visible]
> 120V (US) Gaggia Classic
Most US Gaggia Classics were sold with a 2P socket and are **ungrounded**. It is recommended that espresso machines be grounded and powered through a GFCI/AFCI/RCD device.
Grounding, also referred to as Earthing, offers an alternative route for electrical current to dissipate into the ground should there be a wiring system malfunction or the introduction of a conductive substance, such as ionized water.
Without a grounded housing, if the AC line came loose and contacted the housing the machine may still work, but touching the metal housing would be the same as touching a live power socket. With a grounded housing, breaker, and ideally a GFCI/AFCI/RCD device, an AC wiring fault will trip the breaker or circuit interrupter before becoming a danger to the user or the system.
> [!WARNING|style:callout|label:WARNING|iconVisibility:visible]
> Earth Ground is **not the same** as 5V GND (aka 0 V, " - ", or 5V COM). The DC system uses a "floating ground" for thermocouple compatibility. Do not connect the two.
### Bill of Materials
?> As these are US-specific components, many cannot be found on AliExpress or may be no cheaper there than purchasing from Amazon, Digi-Key, Mouser, etc.
Links are provided, but feel free to shop around.
* C14 3P Panel-Mount Socket for 1.2-1.5 mm panel thickness *(choose **one** that's in-stock)*
* Schurter [6100.4312](https://www.digikey.com/en/products/detail/schurter-inc/6100-4312/640562) (Digi-Key)
* Schurter [6100.4315](https://www.digikey.com/en/products/detail/schurter-inc./6100.4315/569906) (Digi-Key)
* 5-15P to C13 Right-Angle Power Cord, 14-16 gauge *(choose **one** that's in-stock)*
* Qualtek [313010-01](https://www.digikey.com/en/products/detail/qualtek/313010-01/183386)
* Assmann [A-PC2304-020027-1](https://www.digikey.com/en/products/detail/assmann-wsw-components/A-PC2304-020027-1/3135012)
* 0.4+ m Heat-Resistant Silicone Wire, 16-18 gauge
* [Green, 18AWG 1m](https://www.aliexpress.com/item/2255800441309579.html)
* *4x 6.3 mm female spade connectors (use spares from main BOM)*
>
### Instructions
#### Replace Socket
Remove wires. Make a note of where they started, but also check the schematic. On a number of machines L and N are switched. This doesn't make a difference for stock operation, but it might for Gaggiuino depending on if/how you integrate into the stock wiring harness.
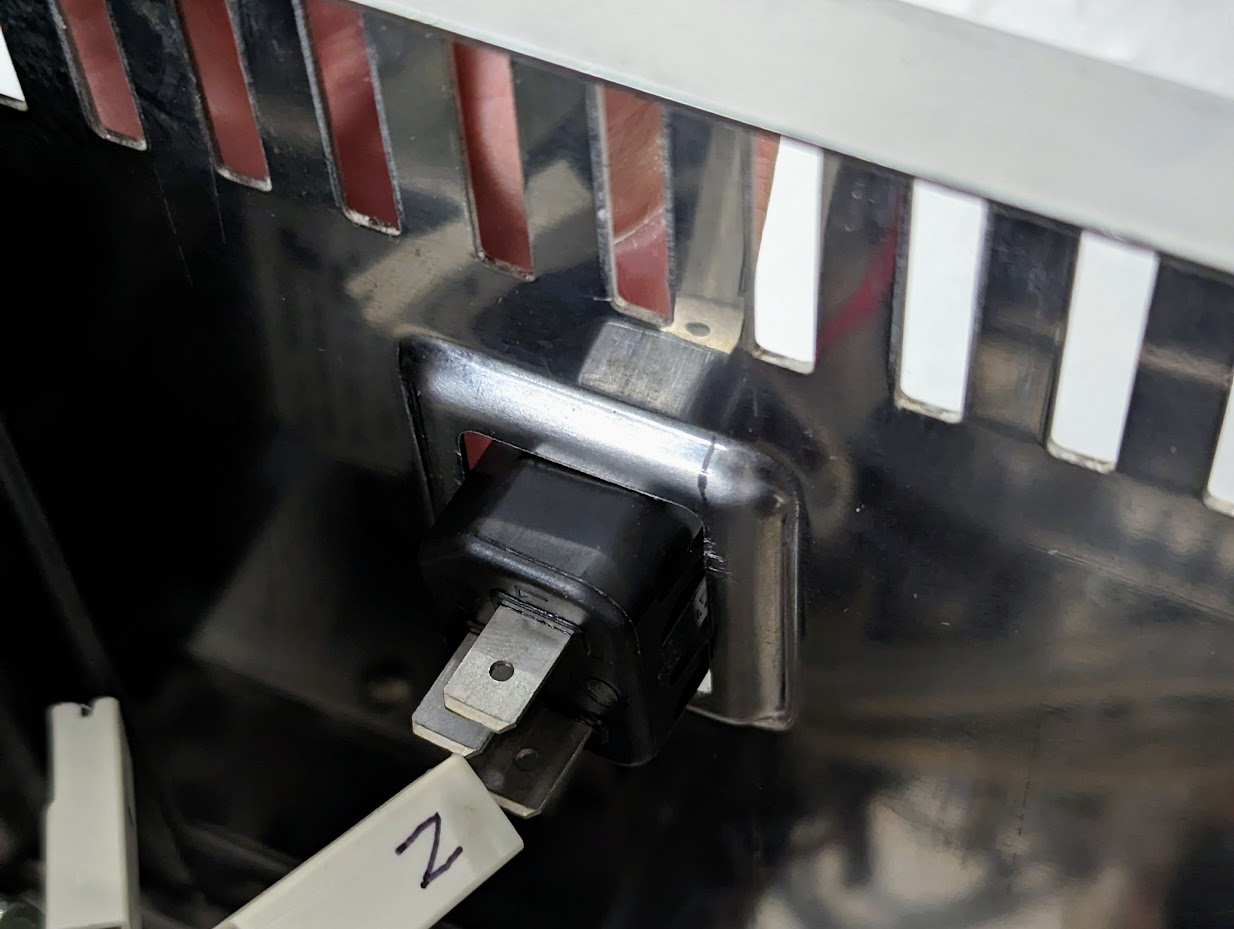
Use wide-jaw or channellock type pliers to squeeze the retaining tabs (shown below) and push on the plug. Alternate between top and bottom pair of retaining tabs with a bit of a wiggle and it should pop out fairly easily.
Install the new socket by pushing into place and making sure all locking tabs are seated
>
#### Add Grounding Wires
> [!TIP|style:callout|label:TIP|iconVisibility:visible]
> These instructions are for stock wiring integration. If following the custom wiring schematic you can use the ground connections noted there.
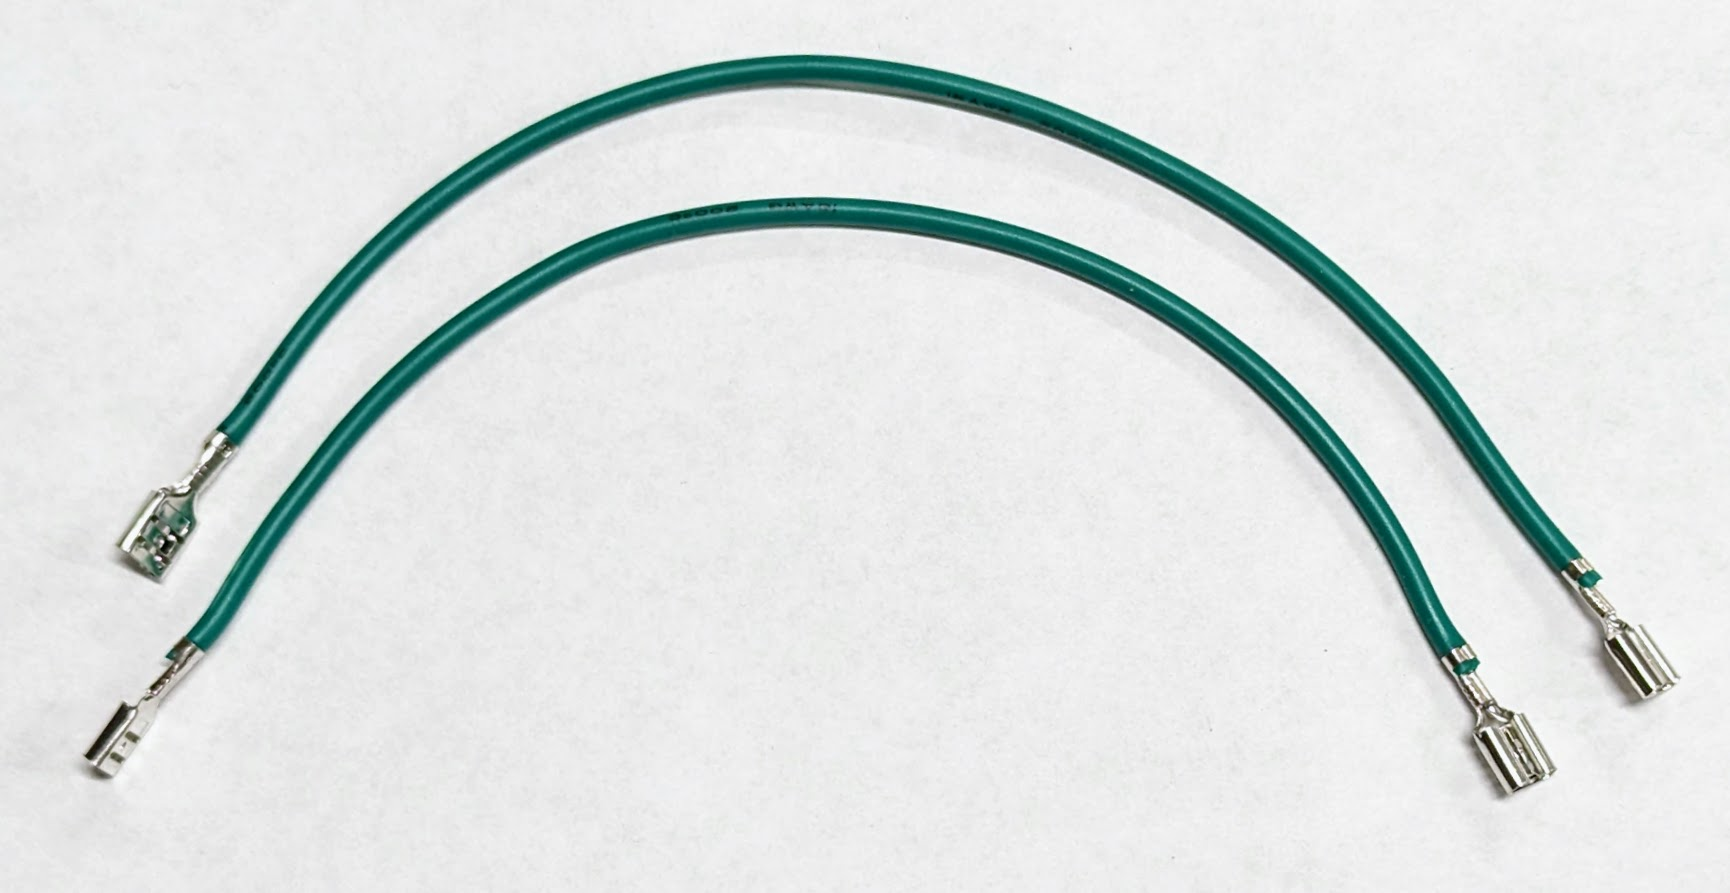
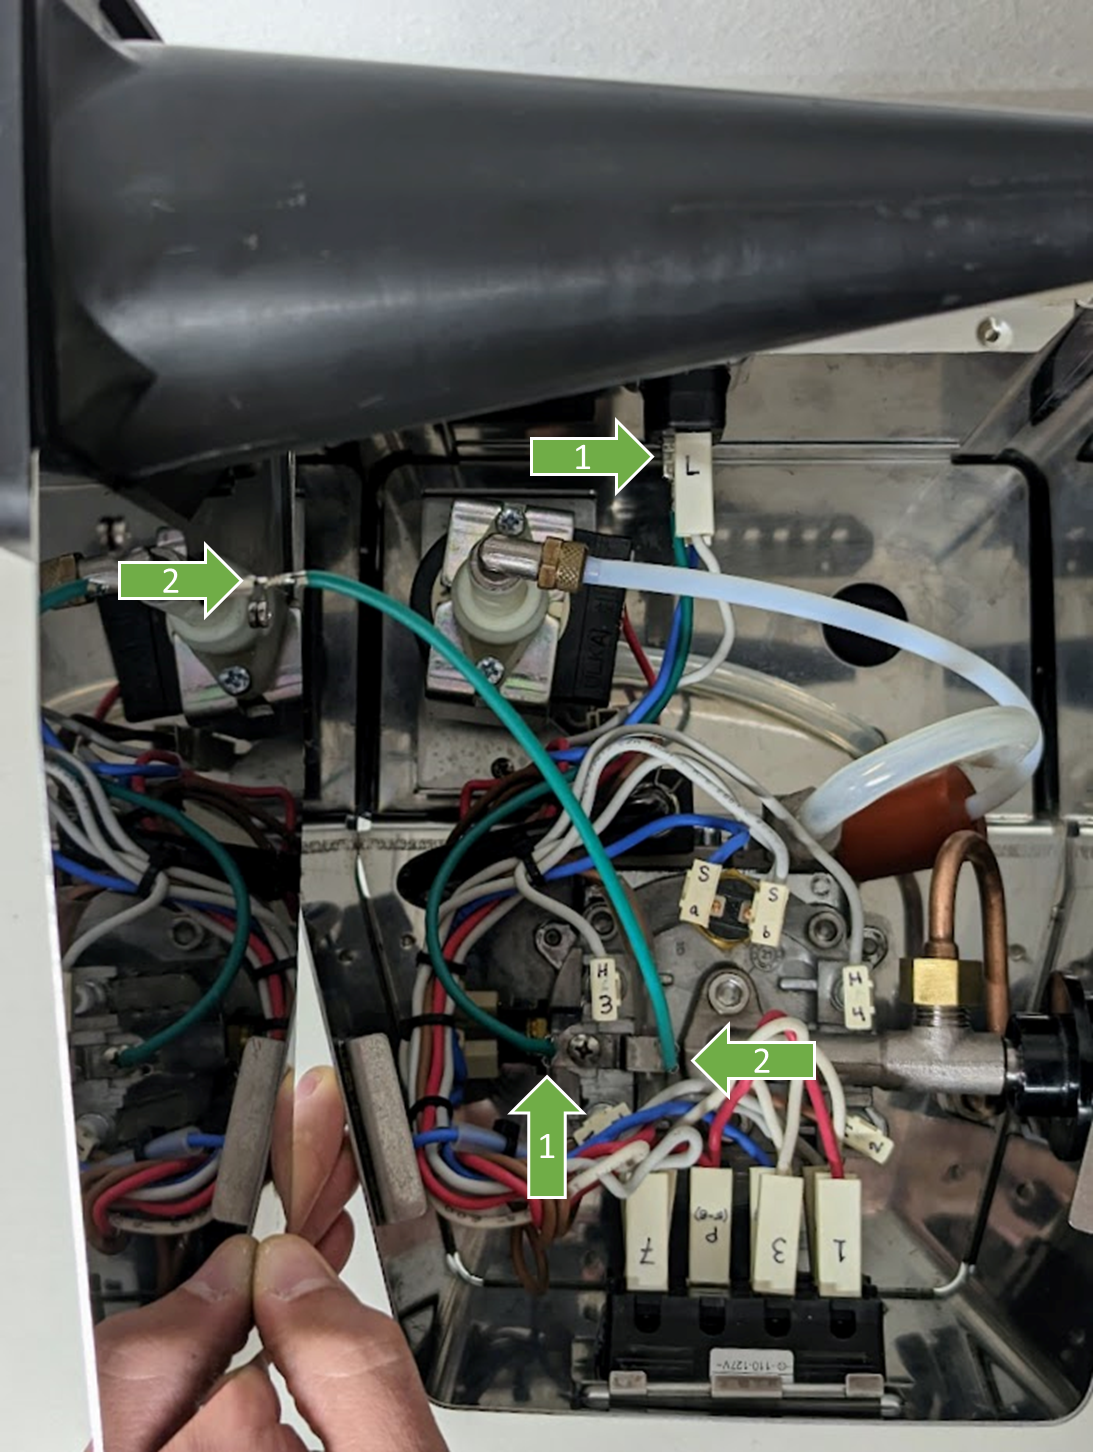
Cut two lengths of ~200 mm wire to go from socket to boiler fuse clip / ground connector and from there to the warming plate connector. Crimp on spade connectors
!> Insulation on pre-insulated spade connectors attached to the boiler will melt. Use un-insulated spade connectors or remove insulation.
Attach the Line, Neutral, and Ground (noted) wires.
?>Per the Gaggia Classic 120V 2009 schematic, Neutral (Blue) goes to the thermal fuse on top of the boiler and turns to Brown after passing thru the fuse. Line (Gray) goes to the top of the power switch. Colors may change depending on model and time of manufacture.
Grounding is complete!
 Use wide-jaw or channellock type pliers to squeeze the retaining tabs (shown below) and push on the plug. Alternate between top and bottom pair of retaining tabs with a bit of a wiggle and it should pop out fairly easily.
 Install the new socket by pushing into place and making sure all locking tabs are seated
 >
#### Add Grounding Wires
> [!TIP|style:callout|label:TIP|iconVisibility:visible]
> These instructions are for stock wiring integration. If following the custom wiring schematic you can use the ground connections noted there.
Cut two lengths of ~200 mm wire to go from socket to boiler fuse clip / ground connector and from there to the warming plate connector. Crimp on spade connectors
!> Insulation on pre-insulated spade connectors attached to the boiler will melt. Use un-insulated spade connectors or remove insulation.
>
#### Add Grounding Wires
> [!TIP|style:callout|label:TIP|iconVisibility:visible]
> These instructions are for stock wiring integration. If following the custom wiring schematic you can use the ground connections noted there.
Cut two lengths of ~200 mm wire to go from socket to boiler fuse clip / ground connector and from there to the warming plate connector. Crimp on spade connectors
!> Insulation on pre-insulated spade connectors attached to the boiler will melt. Use un-insulated spade connectors or remove insulation.
 Attach the Line, Neutral, and Ground (noted) wires.
?>Per the Gaggia Classic 120V 2009 schematic, Neutral (Blue) goes to the thermal fuse on top of the boiler and turns to Brown after passing thru the fuse. Line (Gray) goes to the top of the power switch. Colors may change depending on model and time of manufacture.
Attach the Line, Neutral, and Ground (noted) wires.
?>Per the Gaggia Classic 120V 2009 schematic, Neutral (Blue) goes to the thermal fuse on top of the boiler and turns to Brown after passing thru the fuse. Line (Gray) goes to the top of the power switch. Colors may change depending on model and time of manufacture.
 Grounding is complete!